An Eventful Twelve Months for ECCG

Logo

Apart from completing the normal hectic schedule of over fifty shoots, twenty club meetings, several competitions, a beginners' photography course and a one-month exhibition of fifty framed images to name just a few, the last twelve months has truly been an eventful period for East Cork Camera Group.
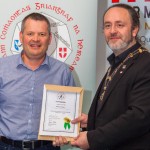
Finbarr O'Shea LIPF

Finbarr OShea LIPF

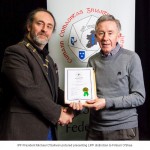
Back in March 2016, Finbarr O'Shea went to the Irish Photographic Federation Distinction (IPF) Sittings in Portlaoise where his panel was successful and gained him a Licentiate of the Irish Photographic Federation (LIPF).

Click here to see Finbarr's successful panel.


Zane Llewellyn LIPF

Zane Llewellyn LIPF

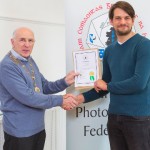
In September 2016, Zane Llewellyn went to the IPF Distinction Sittings in Celbridge, Co. Kildare and he too entered a successful panel and was awarded an LIPF.

Click here to see Zane's successful panel.

At the IPF Distinction Sittings at Thurles, Co. Tipperary the following November, Gráinne Davies became the first ever member of East Cork Camera Group to be awarded an Associateship of the Irish Photographic Federation (AIPF) which was the cause of great celebration for Gráinne and the club. Also at this sitting, Anthony O'Connor and Denis Barry were both successful and were awarded LIPFs on the day.
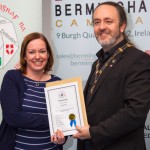
Click the links to check out Gráinne's, Anthony's and Denis's successful panels.

Kevin Day 2

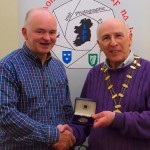
Gold Medal Winner - Kevin Day

To round out the year, Kevin Day went to the Southern Association of Camera Clubs (SACC) Qualifying Round of the IPF Nature Photographer of the Year 2016/17 in January this year and scooped one Gold, one Silver and two Bronze medals and three Honourable Mentions. This fantastic result qualified Kevin to go forward to the IPF Nature Photographer of the Year 2016/17 earlier this month where he won one Gold and two Bronze medals as well as one Honourable Mention for his Red Squirrel studies.

You can see Kevin's impressive winning images here.

All in all, a very successful year and 2017 is already as busy as last year and who knows what more good fortune the year will bring.

If you are interested in photography and would like to know more about East Cork Camera Group, click on the 'Contact Us' link above and leave us a messge.


FacebooktwitterFacebooktwitter
FacebooktwitterredditpinterestlinkedintumblrmailFacebooktwitterredditpinterestlinkedintumblrmail

How I Took that Shot – Gráinne Davies

In our recent 'Colour Burst' competition, Gráinne Davies came first in Grade A. This is how she made the shot:

The theme of the competition was ‘Colour burst’ so the thinking cap went on as to try to capture something a little different. I have some props at home for some abstract and macro work so I took out my trusty coloured slinky to try to see if I could get any shots to fit the theme. I purchased the slinky on Amazon for a few euro and it’s given me a few good images.

I set up a black background (small black sheet) on a coffee table in a sun room with natural light and set up the slinky in various ways. Key thing here was I wanted to use a slow shutter speed so to capture a blur.

To get this shot I had the camera on the tripod and tilted it downwards so it looked directly down onto the slinky on the black cloth set up in a circle so that it held open and the point of focus was the centre of the slinky. I then used a technique called ‘zoom burst’ where I used the zoom on my lens to create the colour blur. The lens I used was a 24-105mm range so I set up the shot zoomed in on the slinky and then using a slow shutter speed over 1.5 seconds I then manually moved the lens to zoom out slowly and steady until reaching 24mm and the image was captured over the 1.5 seconds. This technique takes a bit of practice to master properly. The slow shutter speed created the colour blur similar to streaking car lights at night.

I shot the image in RAW and converted to JPEG but did very little post processing work as I had done it all in the preparation of my shot so it needed little work afterwards.

Canon 50D 24-105mm lens, f5, 1.5 sec, ISO 100

Well done Gráinne!

See also:
How I took that Shot - Zane Llewellyn
How I took that Shot - Karina Leeson
Competition Gallery
Competition Results and 2016 League Table

If you are interested in photography and would like to know more about East Cork Camera Group, click the 'Contact Us' link above.

FacebooktwitterFacebooktwitter
FacebooktwitterredditpinterestlinkedintumblrmailFacebooktwitterredditpinterestlinkedintumblrmail

How I Took That Shot – Gráinne Davies

Gráinne Davies had a convincing win in Grade A in our second internal competition of the year with the interesting image below. The theme was 'Curves' and this is how she made the image:

grainne davies-1

I was a bit torn on ideas for the Curves theme competition as to what to shoot for it including squiggling car trails or cocktail glasses. I had bought some props last year including coloured and silver slinky springs so I spent an afternoon taking some shots of them in different configurations to try to meet the curves theme.

I have a small portable studio box with different coloured backgrounds so for this shoot I used a black background. I lit the spring with natural window light and a desk lamp as I didn’t want to use flash. I used a wide aperture to ensure the image was fully focused. I liked this final image as from each of the individual springs there are curves!

Lens used: 60mm macro lens on tripod
Settings: F/32; 4 sec; ISO 100
Lighting used: natural window light and desk lamp


ECCG 'Curves' Competition - 03/03/15
How I took that Shot - Joe Keniry
How I took that Shot - Catherine Millad
Competition Results and 2015 League Table


FacebooktwitterFacebooktwitter
FacebooktwitterredditpinterestlinkedintumblrmailFacebooktwitterredditpinterestlinkedintumblrmail

How I took that shot – by Gráinne Davies

I was trying to do something different for a still life project I was doing and decided to photograph some oil droplets. You get very resourceful with still life photography and just have to look around the house for props, lighting and let your imagination run free.

Image-No.-2

The set up I used was very simple........

  • Put some water into a glass bowl then add some oil (olive oil/vegetable oil) into the water
  • Add a few drops of washing up liquid to separate the oil droplets.
  • I used a small home studio kit set up on a table in front of a north facing window. If you don’t have a studio kit then just use white/black card (depending on the set up you want).
  • Lift the bowl up a bit (say 10 inches) and set it up onto something so that the bowl is risen up from the surface beneath.
  • Place coloured paper/card/wrapping paper etc on the base below the bowl so this will act as the background but you won’t want this in focus in your shot.
  • Lighting the scene – I used some LED bicycle lights to light the oil from beneath.
  • Set your camera up on tripod and point the camera downwards so that it is pointing directly down towards the oil.
  • Use manual control and manually focus on the area you want as the focal point.
  • Make sure not to use a small aperture of say F22 as you don’t want the background paper in focus, it’s just there to add a background colour.

Image-No.-2-beforePhotoshop changes - This is the original image which I shot in RAW. I used Auto White Balance but later changed it to tungsten in Photoshop as I preferred the blue colouration in the image. I just tidied the image up with some erasing and cloning to remove dust spots and the Pyrex lettering at the end of the bowl. I adjusted the sharpness (unsharp mask) and that’s it.

Check out Google images and Youtube for more tips and help as there is loads of information there and above all HAVE FUN!!!

Technical Details:
Canon 50D camera
Canon 60mm macro lens
F6.3, 1/13 seconds, ISO 250.

FacebooktwitterFacebooktwitter
FacebooktwitterredditpinterestlinkedintumblrmailFacebooktwitterredditpinterestlinkedintumblrmail

How I took that shot by Gráinne Davies

I wanted to photograph water drops and it’s not as easy as it may seem.

Image-No.-3

The set up I used was very simple........

  • Put some water into a black roasting tin
  • I used a small home studio kit set up on a table. If you don’t have a studio kit then just use coloured card (depending on what colour you want out).
  • I used a red velvet background.
  • Pour some water into a bottle or a bag (I used a bag) and suspend the water above the tin of water. Just put a pin hole in the bag and let the water drop into the tin of water.
  • Set your camera on a tripod in front of the water drops.
  • To find a focus I used a pencil and placed it directly where the water drops were falling and focused manually. This will ensure your drops are sharp.
  • Set up a Speedlight flash on a tripod or a flash stand and aim the flashgun directly at the background (not at the water). Set flash to manual and drop the power of the flash as required depending on the exposure of the shots.

Image-No.-3-beforePhotoshop changes - The original was shot in RAW and I changed the colour in Photoshop to give the purple colour. I just tidied the image up with some erasing and cloning and cropped the final image.


Technical Details:
Canon 60D
Canon 60mm Macro lens
ISO 200
F10
1/200

FacebooktwitterFacebooktwitter
FacebooktwitterredditpinterestlinkedintumblrmailFacebooktwitterredditpinterestlinkedintumblrmail