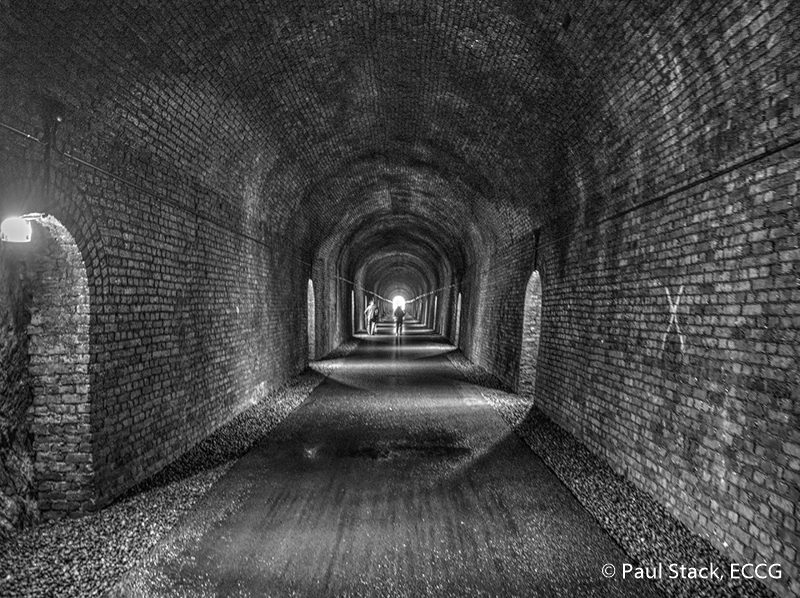
In our recent ECCG ‘Shoots’ Competition, entered images had to have been taken during one of our scheduled shoots held during 2017. Paul Stack took first place in Grade C with just seven points to spare. This is how he made the image:
Thanks to Finbarr for the Copper Coast plan and Michael for knowledgeable driving on route to the Copper Coast in Waterford on a nice day in April 2017. Normally my excursions to Waterford would involve the Comeraghs to get out and enjoy the views with my camera.
The Greenway was the first stop on the Copper Coast Photoshoot excursion, and although the initial plan was to capture one of the viaducts, we strolled down to the Ballyvoyle Tunnel near Shanacool parking area. A very interesting feat of engineering. From deisegreenway.com, “The Railway Line from Dungarvan to Waterford was constructed during the 1870’s and was officially opened on the 12th August 1878”. It has been reopened in recent years providing a long route between Dungarvan and Waterford city for pedestrians and cyclists, and prams 🙂
On entering and leaving Ballyvoyle tunnel I caught a few nice views. I quite enjoy the challenge of capturing images in dark light or night time and the tunnel was a good test of camera skills. Also appeared like some longer tunnel photos looked really good on my camera screen. But I had a feeling when I look at the images from the tunnel at home that they would be blurry, and they were…
So this is where HDR, High Dynamic Range, Photography comes in. In the weeks leading up to the photoshoot I had come across some HDR tutorials and reviews and enabled the saving of RAW format images on my camera as they contain more image information that can be found on a normal JPG image file.
Anthony gave a tutorial in a ECCG meeting around the same week. As a result I downloaded the free version of Photomatix software and did some experiments at home but found a terrible watermarks in the saved images, despite all the time spent in styling.
In purchasing recent cameras i’ve been lucky with increased stabilization with less chance of blurring an image. The camera was Olympus OM-D E-M5 with a standard lens of M.Zuiko 12-50mm ƒ/3.5-6.3.
The image was about a 2 second exposure, and for me taking multiple attempts should normally achieve a non-blurry image.
It should also be mentioned that we had much less traffic inside the tunnel to allow for much better opportunities and less crowded to capture the surroundings.
Before shot at about 25% of the JPG file: (Image: P4090090_small)
Using the RAW file I did some trials with different settings, but had to restart a number of times due to losing the image quality. Sometimes the generated final image with Photomatix just got distorted. The image displayed in Photomatix is a more recent darker attempt, but the figure in the light at the end of the tunnel loses their head. This version is closely related the the Monochrome 2 preset in Photomatix, whereas the competition image is closer related to Monochrome 3 with a lot of tweaks and adjustment to the settings displayed on the right side of Photomatix.
I was aiming to make the image as smooth as I could see it, with keeping an eye mostly on the shadows across the path and trying to emphasize those, while also keeping an eye of the figure in the light at the end of the tunnel. But in applying the HDR process to non-blurry images it didn’t have the same emphasis as the lighting was from the other side of the tunnel. So the light at the end of the tunnel was behind me in this case.
– Paul Stack
Well done Paul.
Click here to see a gallery of images from the competition.
See also:
How I took that Shot – Michael Hickey
How I took that Shot – Noelle Lowney
Competition Gallery
Winners Presentation Photos
Competition Results and 2017 League Table
